
DIY frame houses and step by step instructions
Among all prefabricated structures, frame houses are the most popular. Such buildings have many advantages. They are quite light, so they do not need a strong foundation. Due to its good thermal insulation qualities, such a house can be used not only as a summer cottage, but also for permanent residence. In addition, frame buildings are easy to build with your own hands, which is why many developers choose this option. In our article, we will describe in detail and step by step how to build a frame house.
Technology
do it yourself can be done using Finnish or Canadian technology. But the basic principles of building frame houses for both technologies are the same. Regardless of the choice of technology, we build a frame house, adhering to the following sequence:
- Choice of materials. The basis of such buildings is the frame. It can be made of wood or steel elements. More often, private developers prefer to build a frame house with their own hands using a wooden frame made of timber. Such buildings are economical, environmentally friendly and quick to install. If you decide to build your house on a steel frame, then its price will be 1/3 more. However, these structures are slightly lighter, which allows for a lightweight foundation. Also on a steel frame, you can safely use steel fasteners.
- After the installation of the foundation, they begin to manufacture the floor of the future house. How to make a floor, we will describe in detail in a step-by-step guide.
- After the installation of the floor, they begin to erect the frame of the walls, ceilings and roof.
- Further, the frame made is sheathed with wood sheet materials. The built house is insulated. Window and door openings are being installed.
- Now you can start laying engineering communications and performing exterior and interior wall decoration.
As you can see, the construction technology is quite simple, but to build a frame house with your own hands, you need a construction scheme and drawings. Detailed schemes, which are easy, can be found on the net, but it is much easier to work on a specially designed project, so do not be lazy and order it. When you have a blueprint or diagram in your hands, figuring out how to build a house will not be difficult with our step-by-step guide.
Preparatory work
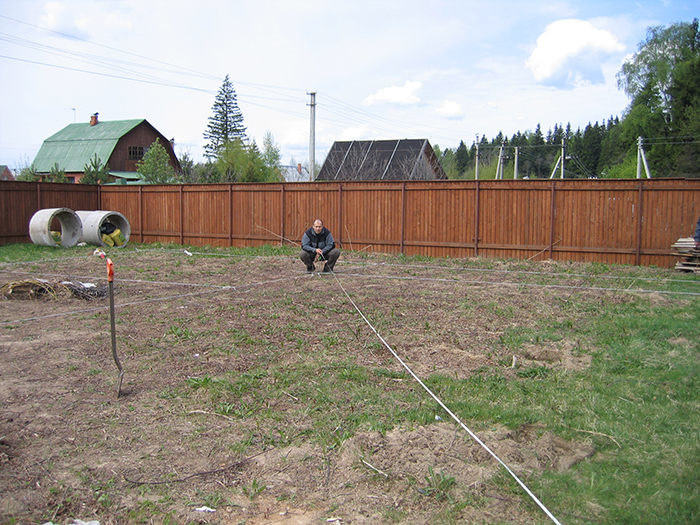
When building a frame house with your own hands, work begins with the preparation and marking of the site for construction. Preparatory work includes the following steps:
- First you need to clear the construction site of debris, stones, unnecessary green spaces.
- If there are irregularities or a slight slope in the territory, then the site must be leveled. That is, all the hills should be cut off, and soil should be poured into the recesses.
- Next, you need to mark up the future building on the site. In order to transfer the data from the project documentation to the site, you need to mark the axes and dimensions of the building with the help of pegs and a cord, it is also worth breaking down the internal load-bearing walls. If we are building a frame house with our own hands, then it is very important that all angles are strictly 90 degrees.
Foundation

If you want to know how to properly build a frame house, then first you should familiarize yourself with the foundation sequence. Since the walls of such a building are quite light, there is no need to equip a massive capital foundation. In this case, we build a house on one of the following grounds:
- shallow-depth monolithic or prefabricated strip foundation;
- columnar base structure;
- pile screw bases.
The easiest way is to build a columnar base under a frame house. The pillars must necessarily be located at the corners of the future house, at the intersection of the walls and with a certain step under the external and internal load-bearing walls. Usually the pitch of the pillars is taken equal to 2 m. The installation of the base is carried out in the following order:
- Under each post, dig holes of the required depth. To do this, you can use a shovel or motor drill.
- At the bottom of the pits, a sand cushion 100-150 mm high is made. Wet sand is carefully compacted.
- After that, a wooden formwork is installed. It should rise above ground level by at least 30 cm.
- The inner surface of the formwork is lined with roofing material, which will act as a waterproofing and facilitate the dismantling of the formwork.
- Concrete is poured into the formwork to a height of 5 cm.
- After the concrete mixture has hardened, a reinforcement frame is installed. At the same time, it should not approach the formwork closer than 50 mm. On top of the frame, it is necessary to leave reinforcement outlets 15 cm long, which will make it possible to tie together the structure of the pillars with the grillage.
- Concrete is being poured.
Important: in addition to reinforced concrete, poles can be made from ready-made concrete blocks, bricks, steel or asbestos pipes with concrete poured inside.
For the manufacture of the grillage frame, rods with a cross section of 12 mm connected with wire are used. Formwork for grillage is made from boards. After installing the reinforcing cage, it is associated with the release of reinforcement from the pillars. After pouring and tamping the concrete mix, 300-500 mm long studs are inserted into the grillage. They will then attach the frame of the house.
Base binding

After setting the mortar and dismantling the formwork, horizontal waterproofing of the base is performed. To do this, lay two layers of roofing material on bituminous mastic. Usually, a beam with sides of 15 cm is used to perform the strapping.
Attention: the cross section of the strapping beam is directly related to the pitch of the posts. The larger it is, the larger the cross section of the beam is needed to avoid sagging.
If you build frame houses with your own hands, the step-by-step instructions for installing the strapping will definitely come in handy for you:
- The bar is mounted on a foundation base along its perimeter. At the same time, they strictly control the length of the walls and constantly check the data with the project. Docking of the beam is allowed if its length is not enough. The joints should be directly above the posts. In the corners and at the docking point, the bars are connected into a “half-tree”, fixed with nails and corners.
- The beam is attached to the base with bolts and studs. To do this, holes are drilled in the timber and foundation heads. Fasteners, if possible, should be deepened into the material.
Floor

To know how to build a frame house correctly, you need to understand the process of making the floor of the future structure. For a log, it is worth taking a beam with a section of 100x200 mm. The lag step is selected based on the width of the insulation boards. Usually it is taken equal to 60-70 cm. The logs are attached to the strapping beam with the help of corners and nails.
After that, the installation of the floor is carried out in the following sequence:
- We attach cranial bars to the installed lags, and we lay rough roll boards on them.
- Then the surface of the log and roll is covered with a waterproofing membrane.
- Thermal insulation material is laid on top of the membrane.
- From above, the entire structure is closed with a vapor barrier membrane.
- Next, the floor is covered with OSB or moisture-resistant plywood.
Walls and ceiling

We continue to make frame houses with our own hands - step-by-step instructions for mounting walls:
- For the manufacture of the frame, you can use a beam of coniferous wood. To begin with, it is necessary to assemble the span of the wall at the construction site, and then install the assembled structure on the strapping.
- The distance between the racks of the frame is usually determined taking into account the width of the insulation boards that will be laid between them. If mineral wool is used for insulation, then the pitch of the racks should be 1-2 cm less than the width of the heat insulator for its snug fit.
- The frame posts are fixed with nails to the lower and upper horizontal element. For additional fixation, you can use mounting brackets.
- To increase the rigidity of the frame, jumpers are mounted between the vertical posts. They are staggered.
- Window and door openings are arranged in the places specified in the project. To do this, racks are mounted along the edges of the opening, jumpers are mounted above and below the window opening.
After assembling all the spans, they are mounted on the strapping frame in this order:
- The first span is attached to the floor and fixed with props.
- Next, a second span is installed. It is attached to the floor and the side post of the first span.
- All subsequent spans are connected to each other by means of nails.
- For the installation of spans in a strictly vertical position, jibs are used - diagonal struts, which are fixed at the corners.
Installation of internal partitions is carried out similarly to the installation of the external frame. After that, the whole structure is tied on top with a board to give additional rigidity. Then the walls from the outside are sewn up with oriented strand boards.
The ceiling is mounted on the upper trim:
- To do this, grooves are made in the beam into which the beams are inserted.
- They are additionally fixed with nails and steel corners.
- Support bars are mounted along the internal partitions. They are connected to the top and bottom trim.
- Then the ceiling shield is nailed. It is better to make it from grooved boards.
- After that, a vapor barrier layer is laid. The material should also be wound on the ceiling beams.
- Now the insulating material is laid out.
- The thermal insulation layer is covered with a waterproofing film.
- The draft floor is laid from the boards.
Roof

To know how to build a frame house yourself, you need to understand the sequence of arranging the roof:
- Rafter pairs are assembled on the ground into a structure, like a truss, and rise up to be installed on the upper strapping bar. The overhang of the rafters should be within 350-500 mm. The first to mount the rafter pairs on the gables.
- All subsequent rafter pairs are installed between them in increments of 700 mm from each other.
- The rafters are connected by a ridge beam, which is attached to the "paw floor".
- Next, a solid or thinned crate is made, which is laid on a waterproofing membrane fixed on the rafters with a counter-rail.
- Now you can lay the selected roofing.
- At this stage, you can announce to your family members and acquaintances about the completion of the installation of the housing box.
Wall insulation

For insulation of the house, expanded polystyrene, mineral wool or polystyrene are used. The thermal insulation layer must be at least 50 mm thick. Insulation and decoration of the walls of the house are carried out in the following order:
- Thermal insulation material is laid between the racks of the frame. If two layers of material are used, then the joints of the plates in the layers should not coincide.
- From the inside, the walls are covered with a layer of membrane vapor barrier, which is attached over the insulation to the frame racks with a stapler.
- Then the walls from the inside of the house are sewn up with OSB, moisture-resistant plywood or clapboard.
- From the outside, the walls of the house must be protected from moisture. For this, a waterproofing membrane is attached to them.
- Then a crate of slats is stuffed onto the walls, which will allow ventilation of the walls of the frame building.
- The selected finishing material is sewn over the rails. For exterior decoration of the facade of a house built using frame technology, you can use vinyl siding, lining, etc.
How to build a frame house with your own hands - video lesson: