
Finishing the house with facade thermal panels or a thermal fur coat - which is better. Facade thermal panels for exterior decoration of the house Methods of fastening panels
One of the most interesting facade finishing technologies today is clinker thermal panels. We have analyzed the key features of this finishing material, including the specifics of installation, behavior in different climatic conditions and the impact on the thermal protection of buildings.
Varieties and cost of thermal panels
When choosing thermal panels for facade cladding, it is easy to run into a limited choice. Despite the fact that for clinker panels alone there are about a dozen various kinds fundamentals, in a single region you can personally get acquainted with only two or three samples of such products.
According to the type of base, the panels are divided into homogeneous and multilayer. The latter variety can now be found quite rarely, mainly at exhibitions. construction technologies. Reinforcement sheet materials should perform the task of preventing shrinkage of the foam polymer at the first stages of setting, however, in the technology of injection molding high pressure no such deficiency is observed. At the same time, the introduction of an additional hygroscopic layer into the thermal panel does not bring significant benefits, but it can worsen the heat-insulating properties of the finish and form a pronounced thermal barrier, where moisture will condense with a high risk.

Single-layer panels have a base of one of three types: PSB, XPS (EPS) and PPU, and the cost increases in this order. In terms of thermal performance, all these materials are very similar, only their frost resistance, operational stability and fire safety differ.
Clinker tiles from a wide range of manufacturers are used as a cladding layer. She provides reliable protection insulation from external influences and at the same time forms a finished surface with an almost exclusive appearance. Naturally, the more confidence in the tile manufacturer, the lower the likelihood of detecting defects over time. In principle, the clinker tile itself is a very strong and durable material, its qualities can only be spoiled by the introduction of third-party impurities into the original raw material.

According to the manufacturing method, the panels are divided into bulk and pressed gluing. It is quite expected that pouring the heat-insulating filler into a matrix with a tile on the bottom provides the highest possible quality of adhesion, however, this production technology requires special equipment. The tiles are also glued to the insulation by repeated pressing, which ensures high performance. Thermal panels of this production method should be purchased only from a trusted supplier.
Panel fixing methods
Thermal panels are very demanding on the quality of base preparation. Due to the large format, they are largely subject to temperature deformations and the influence of seasonal shrinkage of the building. However, taking care of the preparation of external walls for the installation of thermal panels pays off with interest: they not only form a finishing layer with a high-quality appearance, but also provide the required value of the specific resistance of the walls to heat transfer.
In Russian construction practice, quite often there are attempts to save money due to the fact that the thickness of the panels is reduced by initially sticking ordinary insulation boards on the facade. In this case, the thermal panel is used simply as a way decorative finishes. There is no justified benefit from this: the main cost of thermal panels is precisely the tile, while the cost of increasing the thickness of the insulated base is approximately comparable to the selling price of insulating materials. In covering the facade with expanded polystyrene for the installation of thermal panels, the only benefit lies in the preliminary preparation of the surface in order to level it or increase adhesion.

Since thermal panels are able to fully provide thermal protection of the building and at the same time are not sensitive to getting wet, they do not need to arrange space for ventilation. On the contrary, the presence of an air gap between the wall and the thermal panel can provoke the formation of condensate in the area adjacent to the carrier layer. This is especially detrimental to walls made of wood, cellular concrete or SIP panels.
There are two ways to provide quality installation thermal panels. The first is preparatory plaster with a tolerance for plane curvature of the order of 1-1.5 mm / m, but not more than 10 mm over the entire wall area. The second method refers to “dry” construction: a supporting subsystem is mounted on the walls, the space between the racks is filled with insulation, then panels are attached to the frame. In both cases, the panels form an almost monolithic cake with the wall.
Mounting substructure
Thermal panels create a minimum load on the base, depending on the thickness of the insulation, their specific gravity can be 7-15 kg / m 2. For this reason, the mounting structure does not need to have an outstanding load-bearing capacity, but its durability should not be in question.
It is not recommended to use profiles for GKL under thermal panels. It is better to give preference to glued beams or hardwood lumber. Before installation, the bars or slats must be impregnated with a combined action antiseptic, and then hydrophobized.

The need for an installation subsystem, as a rule, is due to the difficulties in fixing the thermal panels to the bearing layer of the wall. In particular, this solution applies to frame construction, or if loose shell rock or foam concrete was used as a masonry material. The rail itself may have multiple distributed attachments, while the panel is attached to the subsystem at only four or five points.

Pie insulation and vapor barrier
The main counterargument against the use of thermal panels is the problem of condensation of water vapor penetrating from the inside of the room to the outside due to the difference in partial pressure. Since the insulating base of the panels has almost zero gas exchange capacity (with the exception of PSB), the masonry material itself must have an even greater ability to retain water vapor. Otherwise, the main rule in the distribution of the layers of the cake according to their ability for gas exchange will not be observed.

There are two ways out of this situation, the first is to increase the thickness of the panels to such a value at which the entire range of dew point coordinates will be entirely inside the insulation. The calculation for clinker thermal panels is carried out according to the same principle as when insulating with plates of the same material as the insulating base. If there is a reinforcing sheet at the base, the calculation is performed according to an individual scheme; most calculator programs are not able to calculate such a pie.
The second way to prevent moisture condensation is to limit its penetration into the walls by sheltering internal walls vapor barrier. At the same time, the zest of "breathing" walls, which are able to regulate the humidity inside the building in a natural way, is lost. This approach requires a more thorough study of the ventilation system.
decorative properties
High-quality thermal panels do not lose their appearance after 30 or even 50 years. In turn, the experience of using mediocre products shows exactly the opposite results. For breaking appearance thermal panels with clinker tiles, there are several risk factors.
The clinker itself does not lose its properties under the influence of ultraviolet radiation, practically does not get dirty and, on the whole, demonstrates exemplary durability. In the assortment of most suppliers there are from two to five dozen variations of colors and textures, it is possible to combine different tiles in one panel. All this makes the decorative value of this finish one of the highest.

The main problem of clinker thermal panels is associated with a violation of the integrity of the seams or peeling tiles from the insulating base. If the latter occurs mainly due to a violation of the production technology, then jointing defects appear due to installation errors.
First of all, you should know that the most durable thermal panels on a five-point mounting system. You should also pay attention to the quality jointing of the seams. Usually, their filling and jointing is performed after the installation of the panels is completed. It is optimal to fill the seams in the evening, to carry out the jointing in the morning next day. The composition of the fugue must be specially oriented for use with clinker tiles. An additional advantage is the presence of a fillet groove on the ends of the clinker, which will not allow the filler to get enough sleep.

Stages of finishing with thermal panels
The main feature of thermal panels as a material for finishing the facade is their large format. With such dimensions, it is quite difficult to bypass the junctions to the openings and correctly calculate the height. For this reason, for finishing facades, manufacturers supply kits made according to custom order. They include both ordinary and corner panels, as well as elements of facing slopes and extensions of the upper row. All that is needed to obtain such a kit is to provide working drawings of the facade with key dimensions, usually the calculation is free of charge. At the same time, work on trimming and fitting panels is minimized.

By the time the set of thermal panels arrives at the facility, the rough surface should already be prepared or the carrier system should be installed. Installation of the panels themselves is extremely fast:
1. A starting perforated profile is attached along the base line, which serves as a zero mark. The starting tray allows you to finish the plinth after the main plane of the walls.

2. Panels are installed and fastened from the bottom up horizontal rows, starting from the outer or inner corner building.
3. The main fastening of the panels is carried out with polystyrene glue, which is applied in a continuous contour around the perimeter and in several places in the center of the back side of the panel.
4. For greater reliability and fixation during the drying of the glue, each panel is fastened with dowels with a plastic plug or self-tapping screws at the locations of the embedded elements, that is, at the T-shaped joints of the seams between the clinker.

5. It is also possible to fasten the panels with umbrella dowels on vertical edges where the base insulation is not covered by tiles. So that the fastening does not interfere with the gluing of the adjacent panel, a round pot is sampled with a pen drill.

6. The vertical joints of the panels are connected using a highly adhesive polyurethane adhesive, which is applied to the gaps and the back of the protruding tiles of adjacent thermal panels.
7. Horizontal joints have a quarter joint, which is also filled with glue.
8. After the installation of the panels is completed, the seams are jointed. You can use a special pistol, you can use a dense plastic bag with a cut corner like a confectionery syringe.

9. Stitching is carried out 10-15 hours after filling, it is optimal if the whole period is kept at low temperature and moderate humidity.
Facing the facade of a private house is made after the insulation of its walls. There are many technologies and materials for performing both types of work. However, it is much more practical to immediately mount thermal insulation and facade decor using a special multi-layer sheathing. To do this, it is enough to purchase thermal panels with clinker tiles, consisting of a heater and a facing coating. Such finishing elements are not cheap, but they are mounted simply and quickly.
What are facade thermal panels with clinker tiles
Decorative thermal panels for decorating the facade of a low-rise private house are a multilayer cake made of several materials. The outer layer is frost-resistant and waterproof clinker tiles made of clay baked at high temperatures. Under it is a heater:
EPS (extruded polystyrene foam).
PPU (polyurethane foam);
Panel Structure
Conventional foam plastic is practically not used in these facade panels for residential buildings. He's too hot. There are few thermal panels on the market with mineral wool. It is capricious in relation to moisture, which leads to an increase in the cost of installation due to the need to arrange waterproofing, and is more difficult to work with. If insulation and exterior decoration of the house is required to be done with it, then it is best to install mineral wool and facing in the form of clinker tiles separately.
Some manufacturers, in order to give additional rigidity, under the heat insulator of the decorative facade panel, make another layer of the substrate from OSB or LSU. However, this option is more intended for cladding the facades of private houses built using frame technology. For brick or foam concrete cottages, it is preferable to take less expensive thermal panels without a wood or glass-magnesite slab on the inside.

Variant using OSB
The facade of the house, finished with warm panels with clinker tiles, will last at least 20-30 years without repair. This outer cladding resistant to precipitation and changes in street temperature. Small clinker tiles of the front finish reliably protect the expanded polystyrene and polyurethane foam inside the thermal panels from external influences. And the variety of their shades makes it easy to select other materials for decorating the facade that are in harmony with it for such a cladding.
Advantages and disadvantages of thermal panels
Intended for exterior finish houses facade thermal panels have a lot of advantages, among which are:
Simplicity and speed decorative design facade;
No need for additional thermal insulation of the house;
Durability of polyurethane foam and environmental safety of expanded polystyrene;
Removal of the dew point from the thickness of the outer walls to the cladding, which only increases the durability of private country houses;
A variety of colors and textures of clinker tiles (on sale there are panels with imitation of ordinary or aged brick, adobe and natural stone);
Savings through simpler self-assembly finishing the facade of your own house, consisting of large elements;
Resistance of clinker tiles on decorative panels to mechanical stress, frost, water and fire;
A small number of seams, minimizing the number of cold bridges in the facade cladding made of thermal panels;
The stability of the exterior finish of the house to ultraviolet, even after a decade, the clinker tiles will not fade under the sun.
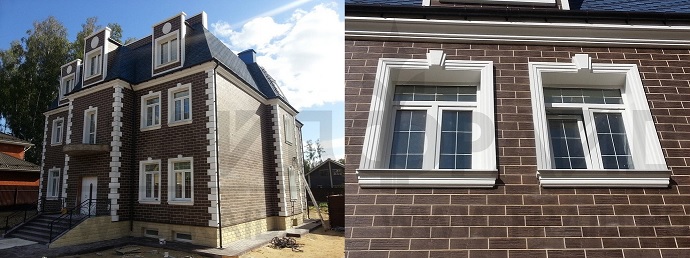
 House before finishing
  House after finishing
Among the shortcomings of the considered thermal panels for facades, four minuses are worth mentioning:
The presence on the market of facade building materials for private houses of a considerable amount of low-quality falsification.
The rigidity of the panels having clinker tiles in their structure for bending, for walls with differences of a couple of centimeters, you will have to make a frame.
Quite low with improper installation, only 10-15 years, the service life of the facades of residential buildings with expanded polystyrene inside.
The high cost of thermal panels with a heat-insulating layer and external clinker tiles.
Unlike polyurethane foam, polystyrene foam in facing slabs for the facade of a house has voids inside, into which moisture can get. And during frosts, this water freezes, which leads to chipping of the insulation in the thermal panel mounted on the facade of your cozy home. Polyurethane foam under clinker tiles is not subject to this scourge. Panels with it in any case will last at least fifty years.
Types and characteristics of thermal panels for facades
At the factory, in the manufacture of panels, clinker tiles with polymer insulation are connected with glue or simply pressed into it. When using the second version of this facing material, the facades of houses last longer. It is more reliable and durable. However, the price of pressed panels is higher than that of glued products.
The cost also depends on the place of production. Facade thermal panels from German manufacturers will cost more than those made in Russia. This affects the payment for the brand and the transport shoulder to the house being built. However, their quality and the resulting facade will definitely be on top.
E-Klinker
The company produces panels with Polish and German XPS-based clinker tiles. Works since 2010. Also offers finishing and visualization services.
Panel characteristics table
Work examples


Installation instructions
The company provides turnkey installation services. Instructions for independent work no.
Plitker
The company produces thermal panels based on German and Polish clinker tiles. PPU is used as a heater. Has all the necessary certificates, free shipping. It also provides installation services.
Work examples


Presentation of the company
Fraid (termopaneli-fraid.ru)
One of the first companies in this area. Works since 1994. Participant of many construction exhibitions and awards.
| Tile | Area, m2 | Thickness, mm | insulation | Price from |
|---|---|---|---|---|
| Feldhaus | 0.5 or 1 | 50/100/150 or 30/60/80/100 |
Expanded polystyrene PSB-S35 | 2500 rub. |
| Estima | 0.5 or 1 | 50/100/150 or 30/60/80/100 |
Expanded polystyrene PSB-S35 | 1350 rub. |
| Cerrad | 0.5 or 1 | 50/100/150 or 30/60/80/100 |
Expanded polystyrene PSB-S35 | 1680 rub. |
| Falcon | 0.5 or 1 | 50/100/150 or 30/60/80/100 |
Expanded polystyrene PSB-S35 | 1390 rub. |
| Kerama Marazzi | 0.5 or 1 | 50/100/150 or 30/60/80/100 |
Expanded polystyrene PSB-S35 | 1635 rub. |
| Opoczno | 0.5 or 1 | 50/100/150 or 30/60/80/100 |
Expanded polystyrene PSB-S35 | 1750 rub. |
| Paradyz | 0.5 or 1 | 50/100/150 or 30/60/80/100 |
Expanded polystyrene PSB-S35 | 1650 rub. |
| Robin | 0.5 or 1 | 50/100/150 or 30/60/80/100 |
Expanded polystyrene PSB-S35 | 2740 rub. |
| Keramin | 0.5 or 1 | 50/100/150 or 30/60/80/100 |
Expanded polystyrene PSB-S35 | 1350 rub. |
| Stroeher | 0.5 or 1 | 50/100/150 or 30/60/80/100 |
Expanded polystyrene PSB-S35 | 2520 rub. |
| A.D.W. Klinker | 0.5 or 1 | 50/100/150 or 30/60/80/100 |
Expanded polystyrene PSB-S35 | 2140 rub. |
Work examples


Video installation of Fraid thermal panels
In this review, we touched on one of the most controversial ways to finish the facade. On the one hand, thermal panels simultaneously provide both a high-quality appearance and quite reliable thermal protection, however, there are many examples of unsuccessful experience in the use of such material.
The combination of decoration and insulation: how it works
Composite facade panels are a unique material that combines the properties of decorative cladding and insulation. During the production of panels, rectangular molds are used, on the bottom of which a decorative material is laid inside out: clinker or porcelain tiles, or marble chips applied to a woven base. After that, the adhesive coating and adhesive composition are sprayed, then the insulation plate is placed in the mold.

As a rule, extruded polystyrene foam (XPS) is used in modern thermal panels. The use of polyisocyanurate and polyurethane foam is less common, but such panels are considered to be of higher quality. Firstly, the thermal conductivity of these materials, although not much, is lower than that of XPS. Secondly, the hardening technology allows you to add insulation to liquid state, achieving high-quality adhesion to the finishing layer without the use of additional adhesives. Thermal panels that use granulated polystyrene foam are not worth even the slightest attention.

Due to the presence of grooved edges on the short ends of the panels, they are extremely easy to join, forming a continuous finish front with inconspicuous joints. The main difficulty in using such material is the need to accurately calculate the dimensions of the additional elements, because the actual size of the facade is almost never a multiple of the length of the tile. Therefore, facade panels are supplied in sets, including standard in-line, corner panels, including those for finishing slopes, as well as additional elements and a narrow final row.
In addition to the complexity of calculating a set of finishing materials, the panels have a rather specific installation technology and are demanding on the quality of the base. However, if all the basic requirements are met, the facade will be reliably protected from atmospheric influences in the next 20-30 years, and the thermal protection of the building will noticeably improve.
Scope of thermal panels
Thermal panels for the facade cannot be considered as the main method of insulation. First of all, for the reason that the thickness of the insulation in them is limited: the thickest panels reach 100 mm, but they are quite rare, at least the choice of colors and additional elements is very limited.

Clinker panel with a thickness of 80 mm is an almost ideal way to finish and insulate the basement of a building. Neither clinker tiles nor synthetic insulation have any pronounced water absorption, and therefore are not afraid of frost. At the same time, a strong decorative shell will provide reliable protection against mechanical damage. In addition, façade panels are easy to process and do not require a load-bearing subsystem, making them well-suited for protecting foundations on sloping sites.
Clinker panels are rarely used to finish the main part of the facade, both because of the high cost of high-quality and durable products, and because of the not quite up-to-date appearance and because of the impossibility of forming elements of fine architecture: pilasters, rustication, cornices. Panels covered with marble chips are used more often in the main facade decoration, however, they are more demanding on compliance with the installation technology, otherwise the risk of cracking at the joints increases significantly.

The material and type of the base of the facade can be almost anything. Ideally, the facade of a stone building is suitable for finishing with composite panels, on which the initial stage of the wet facade technology was performed with the formation of a base reinforcing layer. It is also possible to panel all types of masonry without insulation, including walls made of gas silicate blocks. Frame-type houses and sandwich-panel houses are also suitable for such finishing, however, the technology in this case is more complex: a draft base is required, which fastens the structural elements and forms a single flat plane.
Features of the preparation of the base
Preparation for the installation of thermal panels consists in leveling the rough surface, reducing or completely eliminating the tendency to cracking and increasing adhesion to form a strong adhesive seam across the entire plane of the panel. Depending on the type of building, the preparation procedure may differ.
For stone buildings made of brick or cinder block, preparatory plastering is required, the purpose of which is to fill the seams between the masonry elements and bring out a common plane with a curvature tolerance of no more than 3-5 mm / m 2. For these purposes, plaster is well suited. cement mortar brand M50 or installation of synthetic insulation boards. If the walls are initially very curved, it is better to stick the insulation in several layers, compensating for the curvature with adhesive seams. A base reinforcing layer is applied over the insulation: the surface is wiped with polystyrene foam glue, then reinforced with a facade fiberglass mesh and wiped with glue again. After the base has dried, it is primed several times to increase adhesion.

For frame buildings, facade cladding with hygroscopic sheet materials is required. In the general case, moisture-resistant plywood or OSB of class 3-4 is suitable for these purposes. Between the plates it is necessary to leave deformation gaps of 4-6 mm. A layer of synthetic thermal insulation can be glued onto the rough surface, it is also possible to immediately apply a reinforced base and primer. However, it must be remembered that in any case, the presence of an XPS layer under the prepared surface is preferable: this material has some elasticity and allows you to compensate for shrinkage.
Formation of a finishing kit
In the simplest case, thermal panels are ordered according to the total area of the facade with a margin of 7-10% for trimming and damage during processing. With this option, an overspending of funds inevitably arises, therefore it is much more profitable to contact the supplier's design department to form a facade finish delivery kit.

To do this, it is necessary to prepare drawings or sketch drawings of all sides of the facade. They should display both general overall dimensions and all window and doorways with reference to the link. It is advisable to indicate the deviation of the main lines (corners, slopes, plinth) from the horizontal and vertical in order to subsequently compensate for these discrepancies during finishing. After processing the order, the consumer receives a ready-to-install trim kit, as well as explanatory documentation with a diagram of the cladding.
The most important features of installation
The installation of the panels itself is extremely simple and will not cause difficulties even for a person who has no finishing experience at all, it is only important to follow the instructions. Initially, a starting rail is nailed along the bottom line of the cladding, for which the CW-50 profile is usually used. If the finish is complete, installation starts from the corners, but if the facade is finished with only in-line panels, you can start from an arbitrary point.

The panels have a tongue-and-groove edge, on which the bare insulation substrate is visible. In these places, mechanical fastening is carried out with dish-shaped dowels, and the panels are also fixed with adhesive for EEPS, which is used in the arrangement of a wet facade. Glue must be prepared according to the instructions, mixing the mixture with an exactly measured amount of water. The general installation procedure is as follows:
- Try on the panel dry and prepare holes in the places where the dish-shaped dowels are attached;
- Remove the panel and apply glue to the ends of the insulation along the contour, adhering to a thickness of 20-25 mm;
- Apply glue in large lumps to the back surface of the tiles protruding from the grooved edge;
- Apply glue in a continuous layer on central part and grind it in one direction with a comb with a tooth height of 10-12 mm;
- Attach the panel to the installation site and make mechanical fasteners;
- Strongly but evenly press the panel against the wall, making sure that the adhesive comes out along the entire contour of the insulation substrate;
- Using the long rule, align the panel with adjacent elements and with the control cord;
- tap panel wooden block: in places where a dull booming knock is heard, the glue does not stick to the wall, which means that the panel needs to be pressed a little harder;
- Hammer expansion nails into dish-shaped dowels;
- Remove excess adhesive and proceed with the installation of the next panel.
Note: If the finish is made only from row panels, the corners are formed with a burr, cutting the panels with a grinder with a diamond wheel at 45 °. In this case, it is necessary to predetermine the offset of the extension so that the trimming of the tiles at the corner is not shorter than 1/3 of their original length.
A thermal panel is a layer of expanded polystyrene or polyurethane foam with clinker tiles embedded in the structure of the material. Due to the rise in the rate foreign currencies we made an overview of such Russian-made facade panels.
There are several options, which are divided into three main parameters:
- Material: expanded polystyrene, polyurethane foam, their combinations, extruded polystyrene foam.
- Joint method: "thorn - groove", docking of rectangular elements with smooth edges.
- Cladding material: porcelain stoneware, concrete, ceramics, clinker tiles, etc.
Main manufacturers in Russia:
- "Workshop of facade materials" (MFM), Moscow;
- FTP-Europa, Moscow;
- Termosit, Zheleznodorozhny;
- "Fride", Dedovsk;
- "Forska", St. Petersburg;
- UMB, Moscow;
- "Regent", Pereslavl-Zalessky;
- "Ermak", Novosibirsk;
- "Plitprom", Skhodnya;
- "Foreland", Moscow.
Consider the characteristics of the most common products of the leaders of this market.
"Workshop of facade materials" offers options with clinker tiles and artificial stone (the texture on the models is presented in the form of brick or stone). Insulation thickness - from 30 to 100 mm.


The range of the company:
- tile "Classic", imitating the shape of brickwork;
- panels "German Collection" - a replica of clinker, popular in Germany;
- panels "Spanish Collection" - replicas of the Spanish texture;
- tile "Stone Collection", imitating natural stone masonry.
| Model | Dimensions, mm | Insulation material and thickness, mm | The cost of sq. m, rub. |
|---|---|---|---|
| One and a half tes-brick | 1250 x 600 x 60 | EPPS, 50 | From 1 590 |
| Beveled travertine | 1250 x 600 x 70 | EPPS, 50 | From 1 950 |
| gretta | 1215 x 600 x 65 | EPPS, 50 | From 1 800 |
| Canyon | 1200 x 600 x 110 | EPPS, 80 | From 2 750 |
| Terra brick | 1040×600×65 | EPPS, 50 | From 1 690 |

The manufacturing company, along with the release of its own products, sells products from other factories. It positions itself as a manufacturer of high-quality panels, but the models with clinker tiles are of German origin, and the porcelain stoneware coating comes from Europe. In fact, only the creation of an insulating layer on materials produced by third-party companies can be attributed to domestic production.

The range of the company includes panels with clinker tiles, with the use of porcelain tiles, plinth options and with imitation of an aged surface. Expanded polystyrene and polyurethane foam are used as the inner layer.


Patents have been issued for the main products of the company. In production, a full technological cycle is carried out, which is implemented on automatic lines. An own control service has been organized, which checks products according to a number of parameters - this ensures that the consumer characteristics of the product will not turn out to be worse than those of the products of most European companies.


The company uses only natural materials(clinker tiles, stone, porcelain stoneware, facade ceramics). Connections of products - "thorn - groove". Insulation - polyurethane foam and expanded polystyrene.


Like almost all Russian manufacturers, the company uses materials purchased from enterprises in other countries as decorative finishes. In particular, clinker tiles are purchased from ABC, Stroher, Feldhaus, Interbau, Exagres. Insulation - expanded polystyrene, neopor or polyurethane foam. The manufacturer offers budget options panels from 990 rubles. for 1 sq. m. Currently, brick-like panels are available in six colors.


The Unique Multi Block company compares favorably with others by its own production of clinker tiles. Experience in the production of material - more than 14 years, which indicates the systematic development of the enterprise. Insulation - polyurethane foam, expanded polystyrene foam and their combinations. The panels are available in thicknesses of 60, 80 and 100 mm at a price of 2,100 rubles. for 1 sq. m.


The company works according to the following scheme: the purchase of clinker tiles from leading European enterprises and the creation of panels based on polyurethane foam. The advantage of the manufacturer can be considered its own developed production and technologies that allow maintaining the high quality of products throughout the entire service life.


8. "Ermak"
In the production of Ermak panels, laser cutting of materials is used, which makes it possible to achieve accurate dimensions and good joining in the form of a tongue and groove. The company offers panels for individual sizes and in standard options. Clinker tiles are supplied by A. D. W., Stroher, Foshan Red Lion Ceramic Co. Insulation - extruded polystyrene foam.
9. "Plitprom"
The manufacturer "Plitprom" began to produce thermal panels one of the first in the Russian market. It uses high-precision European equipment, which guarantees a good connection of products during installation. Delivers facade panels with German clinker tiles "brick-like" in various colors and sizes (price square meter- from 1,200 rubles).
10. Foreland
The company "Florland" specializes in the production of panels and artificial stone. The panels are a composite system based on polyurethane foam with a decorative coating ( fake diamond), which is produced at the enterprise. At present, panels of four models are produced: "XVII century", "Evrok", "Cliff", "Elbrus". The cost of products - from 2,500 rubles. for 1 sq. m.
Styrofoam or polyurethane foam?
The evaluation of a particular material is based on its technical characteristics, operating conditions and consumer opinions. The use of expanded polystyrene and polyurethane foam in panels under the same conditions gives us the opportunity to compare and obtain data for an objective conclusion.
Environmental Safety
Properties
Performance characteristics
Conclusion: all things being equal, polyurethane foam is the most acceptable option.
Decorative coating. Which one is better?
Manufacturers offer several options for finishing panels: porcelain stoneware, concrete, ceramics, clinker tiles, etc.
listed above Russian companies can be divided into two categories. The first is a full-scale production with the manufacture of both an insulating layer and decorative coating, the second is the purchase of foreign-made finishing materials with the subsequent manufacture of finished products. The cost of the panels depends on the choice of finishing material and the thickness of the insulation.
(No ratings yet)
Today, many different building technologies appear - some disappear almost immediately, not justifying the hopes of the developers, and some take root and serve for quite a long time. And the point here is absolutely not their effectiveness (although this is also important) - so that the finishing or construction material had recognition among the people, he must have many advantages and surpass his counterparts in many respects.
Unfortunately, this does not happen often, and in the modern market, many innovations remain unclaimed or at least little in demand. Thermal panels for the facade are no exception here, which, although they showed themselves with positive side, after all, they do not have universal recognition - everything is caused by their exorbitant price, forcing the bulk of people to turn their eyes to cheaper and more familiar technologies. We will talk about facade thermal panels in this article, analyze the material and compare it with other technologies for insulating and finishing the facade of a house.
Characteristics of facade thermal panels for exterior decoration
In fact, considering specifications facade thermal panels for the house, we can unequivocally conclude that this material is useful and worthwhile in terms of finishing and insulating the facade. In many respects, if not superior, then in no way inferior to other similar materials. For some reason it is even surprising that he does not have such wide recognition. See for yourself.

As you can see, everything is very serious, and technical indicators simply open the way for this material to people. But that was not the case - the above-described qualities are not enough for people. Required ease of installation so that all the work can be done by hand, or at least an inexpensive price for their installation. Also need affordable price directly to the material, which is not enough for thermal panels - in this regard, the panels for the facade of the house did not manage to bypass the foam and the rest simple technologies finishes and insulation.
Facade thermal panels with tiles


The main advantages of facade insulation with thermal panels
In principle, we have already dealt with the main part of the advantages of this material, and those who understand the properties of the material have long realized what they will need to deal with. There is just not much left to add.

And, of course, a rather attractive appearance - these panels have a polymer-sand coating on the outside, it can be given almost any texture, including making it look like brick or natural stone. It is this polymer-sand layer of the slabs that distinguishes them from other similar building materials, making it almost unaffected by external influences.
Globally, all facade panels manufactured today can be divided into two large classes of materials made on the basis of polyurethane, and those materials where polystyrene is used as a heater. The differences between them are quite significant, and you need to know about them.

 The only positive thing about this material is its price, which, unlike its counterpart made of polyurethane, is 50 percent less.
If we consider other types of facade thermal panels, then we can still distinguish differences in the type of external decorative layer - there are polymer-sand and metal thermal panels. The latter appeared later, and their appearance was due to an attempt by manufacturers to reduce the price of the material. In fact, nothing good came of this, since there is already an analogue of this material, and it has the name of a sandwich panel.
Also, a sign by which thermal panels for the facade of a house are classified is their appearance - for example, there are clinker panels for the facade (or, in other words, brick-like), thermal panels for wood, stone and many other artificial and natural materials. With the problem of the appearance of the house, we think you will figure it out yourself.
Thermal panels for the facade: issue price
Today, thermal panels are offered by almost all companies that deal with facade decoration. You can see them in almost any hardware store. Prices vary greatly depending on the manufacturer. Finnish, Dutch and German panels are the most expensive in terms of price, costing up to 3000 rubles / sq.m. This can be partly explained by the fact that many of them are made with a clinker coating.
Polish panels at a price in the range 1500-1800 rub/sq.m. And domestic ones, even with clinker cladding, are in the region of 900-1200 rubles / sq.m.
Features of installing thermal panels with your own hands
Like most other modern building materials, thermal panels can be installed in several ways - using a frame and directly on the wall. in the best way installation of this material is mounting on the surface of the wall, but it is not always possible - for example, if the walls have a significant deviation from the level, then it is advisable to install a frame. Let us consider in more detail these two options for mounting thermal panels.
- Frameless installation option- as already mentioned above, it is possible only with smooth wall surfaces. The meaning of this mounting option is that the panel is simply nailed to brick wall dowels through the holes made by the manufacturer.
- Frame method it looks almost exactly the same, but the panels are screwed or nailed not to the brick, but to the supporting beams of the frame - the difference is small, in addition to the ability to level the surfaces of the walls, the frame does not give anything. You can even say so - with this installation option, it will even harm. Air will circulate in the space between the thermal panel and the wall, taking heat from the house - that is why, after fixing the first row of thermal panels, the space between the wall and the panel is sealed with construction foam.
In all other respects, finishing a brick house with facade panels is done in the same way as with any other building materials.
First, a plinth is installed - in this case, the panels go deep into the ground no less than 10-20 cm– the upper part of the basement thermal panel must be sealed with construction foam. Then, ebbs are attached to the base, and only after that the first row of plates is laid - everything must be done according to the level and clearly, without any deviations.
 As mentioned above, the first row of slabs is sealed with building foam to prevent air circulation in the space between them and the brick - sealing is required as in frame version installation, as well as in the case of a frameless installation. And then along the knurled - the second row is laid behind the first row, after the third, and so on until the end.
Great attention must be paid to the slopes - they are installed as standard with the help of a corner element, thanks to which all corners are mounted. There are inner and outer corners. But the point is not that - before attaching the thermal panels to the slopes, they must first be insulated. In all other respects, there are no difficulties during installation - sometimes you even wonder why builders take such money when it comes to, so to speak, assembling an ordinary constructor.
By by and large, that's all, and add about facade thermal panels for exterior finish there is almost nothing at home - just to mention once again that the panels are assembled according to the principle of children's puzzles. One plate is wound from the side under the other, then fixed to the crate or wall.
lt;!-cke_bookmark_61E-gt;