
How to apply liquid wallpaper on the ceiling: professional advice. How to apply liquid wallpaper on the ceiling? Liquid wallpaper for ceiling care
Liquid wallpaper on the ceiling - a great option ceiling finish, which in last years is becoming more and more popular. Such ceilings look not only stylish, but luxurious. The ecological purity of the material captivates the consumer, who at least a little monitors his health. A long service life of the coating is also important for a person who does not want to turn his life into endless repairs. In a word, this material has plenty of advantages, and as for the complexity of the production process, then within half an hour after the start of work, you will already be confidently working with a trowel, improving appearance your dwelling.
In our difficult time, inexpensive repairs have become relevant. You can, of course, save on material. But such savings are doubtful, because cheap material are likely to last a short time.
As for hired labor, there is no guarantee that this repair will be done better for you than you can do it yourself. The fact is that in our age of total unemployment, many “teams” have appeared that are not specialists at all, but they pretend to be.
After watching 2-3 application videos liquid wallpaper on the ceiling, you will not only have a complete picture of this work, but also perfectly cope with this work yourself. You will also understand that it is much better and easier than sticking traditional paper, vinyl or non-woven wallpaper on the ceiling. In order to apply liquid wallpaper to the ceiling, you will need the wallpaper itself and a completely simple tool.
Tool:
- Capacity where you need to fill up liquid wallpaper for swelling;
- Trowel, trowel or spatula;
- Plastic grater;
- Spray.

Of course, the spray gun will give some material savings, but. as a rule, this tool is successfully replaced by the same trowel.
Surface preparation consists in removing old wallpaper or whitewash.
Liquid wallpaper can be applied to old surfaces painted with any paint, as well as to glass. Before applying liquid wallpaper, the surface is primed.
Advantages and disadvantages of liquid wallpaper (video)
How to apply liquid wallpaper on the ceiling: do it right
The technology of applying liquid wallpaper to the ceiling is not fundamentally different from applying them to the walls.
Preparation of liquid wallpaper for work is as follows:
- Soak the material from the bag in water at a temperature of 25-30 degrees 12 hours before starting work;
- Each package is prepared separately. Glitter, as a rule, is poured first. Then, after preliminary shaking the contents of the package, in order to thoroughly mix the components, pouring the mixture into water, we achieve a homogeneous mass. It is best to do this with your hands, without fear for your own skin - wallpapers are made on the basis of natural substances. Glitter, by the way, is often not used at all.
- The resulting mixture is again placed in a bag and left to swell for 12 hours.
- After 12 hours, the material can be mixed, divided into the required portions and stored, if necessary, for two weeks.
- The priming of the walls is carried out shortly before applying the wallpaper. The primer is applied in two layers, subject to the necessary drying. It is not necessary to level the walls perfectly. As for the primer, it is first applied along the ceiling area, and the second layer is applied transversely.
- The finished material should stick well in the wall, without slipping or peeling off. If the mixture is not moist enough, you can add water at the rate of a liter per package. The material is applied with a trowel (spatula) made of stainless steel, with a layer of 1-2 mm.

If you need to renew part of the coating or re-glue completely, a layer of a new coating is applied directly on the old layer. This quality of the material allows you to apply patterns, as well as a pattern of a different color, and indeed, use all kinds of methods for applying liquid wallpaper of a different color, boldly changing the familiar interior. Anything is possible, as long as everything is done right!
The trowel (trowel) during operation must be kept at an angle of about 15 degrees, and not the entire plane.
The next new portion of the material must be mixed with the previous one, in order to avoid uneven coverage.
When the ceiling is ready, you need to slightly smooth the material applied to the ceiling with a trowel dipped in water.
Liquid wallpaper for the ceiling: consumer reviews
A relatively "young" material, called liquid wallpaper, has been successfully "reclaiming" more and more new living areas of apartments and houses for many years now.
Thanks to the great many positive qualities of liquid wallpaper, there are a lot of reviews, and all of them are practically positive.

Liquid wallpaper for the ceiling is a very successful material that allows you to significantly change the interior of your home.
So, reviews:
- Easy to apply to the surface, although this has not been done before;
- It is very easy to repair damaged by children or when rearranging pieces of furniture that have a large height;
- It is easy to close the cracks that have appeared in the ceiling;
- Not only the sound insulation has improved, but also the acoustics in the room;
- They dry quickly, they are not afraid of drafts, and this quality speeds up drying;
- The surface of the ceiling has no joints; it seems that one huge sheet is pasted on the ceiling;
- No cracks and small irregularities of the ceiling are visible;
- Dust does not sit on the ceiling;
- If necessary, it is easy to remove a layer of liquid wallpaper;
- It is not necessary to remove the old layer before applying a new one. The new layer can be applied over the old one.
To all the reviews, you can also add that this wallpaper is an environmentally friendly material, as it contains only natural ingredients.
Liquid wallpaper perfectly tolerate temperature changes and shrinkage of the house, which is important for summer cottages and country houses.
Liquid wallpaper is not subject to fading, peeling for a long time - up to 15 years.
Liquid white wallpaper on the ceiling: reasons for popularity
The vast majority of consumers are accustomed to seeing white ceilings, and this stereotype is firmly planted in the subcortex, especially among conservative natures.
However, everything depends not only on conservatism or stereotypes that have developed, almost for centuries. It is also in such an aspect as design.

Fortunately, in construction and online stores, there is an ample selection of wallpapers of any color. White color is no exception.
So, the main reasons for choosing:
- White liquid wallpaper on the ceiling visually expands the rooms.
- Not everyone likes colored ceilings.
However, as an intermediate (between color and white), there is a variant of light colors: light gray, or pale beige, etc. It's all a matter of personal perception, basically. And one more thing: it’s not a sin before choosing a wallpaper to see photos from various options colors and videos.
You will find even more information about the benefits of liquid wallpaper in the following material:.
The technology of applying liquid wallpaper to the ceiling (video)
In conclusion, I would like to note that even a completely inexperienced repairman can work with liquid wallpaper. In addition, in the rooms during the renovation, there will be no irritating odors, which allows you to make repairs without causing any inconvenience to your household. The process of applying liquid wallpaper is clean, that is, there will be no usual debris during operation. You can ventilate the room immediately after the completion of work, without waiting for the wallpaper to dry completely - this will not negatively affect them. In a word, such a repair has solid advantages! Liquid wallpaper is glued in the living room, hallway, bedroom. It is undesirable to glue in rooms with high humidity! Keep it up and you'll do great!
Examples of liquid wallpaper on the ceiling (photo in the interior)


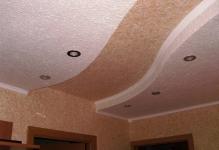


You can decorate the ceiling in an original and simple way with the help of liquid wallpaper. Even the simplest liquid wallpaper on the ceiling without additional drawings will set the tone for the room and help hide surface imperfections.
Liquid finish: concept and consumption
Liquid wallpaper is sold as a dry mix different shades with the constituent structuring elements. The latter influence the formation of a pattern with a particular texture.
It is believed that finishing the ceiling with such mixtures is one of the most convenient, quick and economical options. Manufacturers declare consumption in one package per 3-5 square meters with a layer thickness of not more than 1.5 mm. Achieving this thickness is not easy. The surface of the ceiling for this must be perfectly flat, and the movements during application must be clear and precise.
To create relief patterns, the mixture will need at least twice as much.
Purpose of the room and finishing with liquid wallpaper: when appropriate
So that the application of liquid wallpaper does not violate the functionality of the surface, you need to understand where the use of mixtures is appropriate and where not. Made from a water-based solution, ceiling mixtures tend to absorb moisture and let air through. That is why it is important to select rooms with a normal or low level of humidity for finishing. In the bathroom, in the kitchen, and even more so in the sauna or pool, this option is not appropriate.
The property of finishing to "breathe" should be used when planning the decor of children's rooms, a hall or a bedroom, where it is necessary to work on creating a beautiful, practical and environmentally friendly coating.

On the advantages and disadvantages of finishing
Before gluing liquid wallpaper in the living room, bedroom, or even more so in the nursery, it is necessary to analyze their advantages and disadvantages, drawing the right conclusions. To the main advantage decorative finishes of this type are:
- environmental friendliness - the composition of the mixtures includes safe components of natural origin;
- high level of vapor permeability - the structure of the material with an abundance of small pores removes excess moisture, preventing it from accumulating inside the decorative layer;
- stylish design - in the interior, such a ceiling allows you to implement unusual solutions including through the application of additional applications, drawings and patterns;
- ease of care - to maintain the coating in its proper form simply with the help of an ordinary wet wipe;
- simple application - liquid wallpaper is simply applied without requiring a special tool or knowledge and enhanced preparation of the base;
- long service life - the coating lasts for several decades;
- ease of repair - damaged areas can simply be restored or replaced with new ones without compromising the integrity of the finish.

The disadvantages of liquid finishes for ceilings include the following points:
- instability to moisture - the coating cannot be applied to surfaces in rooms with a high level of humidity, with the exception of special waterproof types;
- difficulties in the process of creating artistic decor - it is difficult to apply creative drawings and patterns to the surface of the ceiling without special skills, so you will have to involve masters in the work;
- cost - liquid wallpaper is not the most a budget option ceiling finishes.
In addition, you need to know about the property of wallpaper to absorb odors in the room.
Types of liquid wallpaper: features
It is necessary to choose mixtures for finishing the ceiling based on the purpose of the room. There are three main types of wallpaper:
- silk;
- cellulose;
- combined.
The most expensive and beautiful finish with mixtures with the inclusion of silk fibers. Moreover, applying liquid wallpaper to the ceiling of this type is beneficial and practical - the finish does not fade over time due to resistance to UV rays, it gives the interior a refined personality.
A more affordable option is cellulose wallpaper with cellulose fibers included. This finishing option is more appropriate for hallways, loggias, attics. The finish looks simple and ordinary, but it allows you to hide surface imperfections and does not require serious costs.

Combined coatings are used for finishing ceilings most often. They are more expensive than cellulose, but cheaper than silk. They combine the advantages of both types, suitable for decorating the hall, bedroom, children's room.
Blends are presented in different options colors and textures, well suited for implementing creative ideas and complementing interiors in any style.
The principle of applying wallpaper: stages
First and most milestone it is considered to prepare the ceiling for liquid wallpaper with leveling the surface, removing cracks and chips. The smoother the surface, the lower the mixture consumption will be.
Before proceeding with the preparation, the furniture and floors in the room are covered with a film. The base is cleaned to a layer of plaster, removing traces of the previous finish, puttied, primed to improve adhesive properties.

It is better to prime the base in several layers, keeping the time for them to dry - at least three hours. Apply a deep penetration primer with a roller, directing each next layer perpendicular to the previous one. It is allowed to replace primer mixtures with water-based or facade white paint.
The next step is the preparation of the composition. Liquid wallpaper is sold in the form of dry mixes and only in rare cases in cooked form. Prepare the wallpaper according to the instructions on the package. Add the specified amount of water to a clean dish, add the powder and stir, leaving to swell for 12 hours. After this period, the mixture is re-stirred, if necessary, texturizing additives and coloring pigments are added.
Mixing water should only be used room temperature to achieve a homogeneous mass. Apply the mixture immediately after preparation and swelling.

Finishing the base of the ceiling with a mixture of liquid wallpaper is one of the most difficult stages, therefore, before proceeding, it is recommended that you familiarize yourself with step by step photos process. Analyzing the reviews of those who had experience with wallpaper of this type, we can conclude that the most convenient method of application is using a spray gun and a roller.
If there are difficulties using the equipment, it is worth trying the proven method - using a trowel and a plastic grater. The mixture is evenly applied to the base of the ceiling, after which it is leveled with a grater, trying to prevent the formation of boundaries between new areas.
The type of decorative fibers will depend on the direction of the smoothing movements, so you can experiment at this stage.
After applying liquid wallpaper to the ceiling, they must be allowed to dry for two days, preventing any mechanical stress. The wallpaper dries without the need for temperature regulation or draft management.

Checking the quality of work is easy. To do this, it is enough to highlight the surface of the ceiling at an angle. Possible irregularities are removed by soaking the wallpaper with water and re-applying the mixture. Additionally decorate the surface with drawings and applications.
Anton Tsugunov
Reading time: 4 minutes
Liquid wallpaper is a modern finishing material, which, despite the name, is completely different from the usual canvases. This type of finish has been used relatively recently and is not yet familiar to everyone, however, it is rapidly gaining popularity due to its practicality, low cost and aesthetic appearance. It is easy to glue liquid wallpaper on walls and ceilings even alone, which is also a definite plus when doing do-it-yourself work.
The main difference between the material is in its structure and application. The coating is mixed and applied to the surface of the walls as decorative plaster and forms a silky finish after drying. Wallpapers have excellent adhesive properties, and therefore successfully used for processing the ceiling, as well as any hard-to-reach areas.
Another plus of the material is the possibility of using it in bathrooms and other wet rooms.
Armed with the necessary tools
For gluing liquid wallpaper on the ceiling you will need:
- Roller for applying and leveling the mixture. Depending on the intended texture, foam rubber, pile or ribbed rubber will do.
Advice. When using a fluffy roller, choose an attachment with a sparse pile. The mixture does not stick to it, and the coating is applied evenly.
- Container for kneading and swelling - a bucket or basin.
- Plastic spatula or trowel.
- Plastic graters.
- Textured hopper gun for large areas.
- Construction goggles to protect the eyes from small particles.
Ceiling preparation
If reinforcement is visible through the crumbling concrete of the ceiling, it is painted over with latex or oil paint to avoid corrosion, and putty after drying.
- There should be no traces of cracked and flaky paint anywhere.
- over the entire surface.
- After cleaning, the base is primed and left until the composition dries completely.
Advice. If the ceiling was covered with oil paint in bright colors that is difficult to remove, you can apply several layers of primer on it. This will prevent the colors of the old and new coatings from mixing. Suitable white or transparent composition. When processing, do not use Ceresit CT-17 primer: it can lead to the appearance of yellow streaks.
Read more about how to remove old coatings - wallpaper, paint, plaster - written.
Bucket and water: preparing the mixture
After the dust has settled and the damp spots from the soil have completely disappeared, you can begin to prepare the working mixture of liquid wallpaper. This procedure does not require viewing training photos or videos - just read the manufacturer's instructions on the package. Usually the mixture needs to be infused and swell from 5 to 12 hours, so you should calculate the time and effort in advance.
Important! Only the entire package can be mixed in one bucket, not part of it. Also, you can not mix the contents of different packages of liquid wallpaper. In order to avoid the appearance of coating drops, it is better to process the entire ceiling in the room at a time.
- In the prepared container, we collect exactly as much water as the manufacturer recommends (usually 7–10 liters). It is good if the liquid is warm, but not higher than 40 degrees.
- Pour the bag with decorative fragments into the water first to ensure even mixing.
- Now add the dry mixture and thoroughly knead the contents of the container with your hands. If it is necessary to cover a large area, we make a separate batch for each package of dry material. Before applying to the surface, ready-made portions must be mixed.
- When the mass is evenly saturated with water, it must be left for the period indicated on the package, and mixed again before use.
Important! When mixing, do not use mechanical devices: rough handling damages the structure of the material, which will significantly worsen its appearance and texture. Remains of wallpaper from the previous mixing can be added to the next.
The finished mixture can be stored in sealed packaging for several weeks without losing its characteristics.
Applying wallpaper to the ceiling
After acquiring the required consistency with the prepared mass, you can begin to apply it to the ceiling. It is not difficult to stick the mixture on the surface correctly, but nevertheless it is worth practicing on any flat area, and at the same time deciding on a suitable texture: depending on the movements of the spatula, the fibers will be arranged differently, forming a different pattern.
Important! If the ceiling is supposed to have decorative elements, then they are fixed before the liquid wallpaper is glued.
To get a decent result, when applying the material, it is enough to follow a step-by-step algorithm of actions.
- We take a small lump of the finishing mixture and form a kind of ball. Then we put a lump on the center of the spatula blade and with return movements we level it over the surface with a layer of 3-5 mm. We observe the previously selected application option (transverse, circular, longitudinal) for each portion in order to form a texture over the entire area of \u200b\u200bthe ceiling.
Any subsequent applied fragment must overlap the previous one. It is necessary to glue the composition without long interruptions so that drying spots do not occur.
- When the entire surface is covered with liquid wallpaper, you can process it with a textured roller. This must be done no later than 5 hours after the start of work.
- Upon completion of all stages, we go down to the floor and carefully examine the fruit of our labors: if no growths are visible, and the color of the original base does not show through anywhere, then the work can be considered completed.
You can read about the nuances of applying liquid wallpaper on drywall in.
mechanical method
Liquid wallpaper can be applied with a plaster gun (texture spray gun). This method is great for use in large areas. For these purposes, a device with a minimum pump power of 200 l / min and a nominal pressure of 0.5 MPa during operation is suitable. The nozzle can be used with a diameter of 5–10 mm. However, it is worth remembering that the atomizer will not be able to work with rough textures.
Liquid wallpaper is glued with a spray gun in two layers:
- for the first - thinner (about 1.5 mm), - a mixture diluted with water is used;
- for the second, thicker, the composition of the usual consistency is taken.
The mass is sprayed in one direction. You can proceed to the finishing layer after the first one has dried.
As a result of mechanical application, a larger wallpaper texture is formed than with manual application. To make it smaller, you need more moisture upper layer roll with a roller, periodically wetting the tool in water.
It is better to find out all the nuances of working with a sprayer in the manufacturer's instructions.
Restoration of the damaged area of liquid wallpaper
Localized coating damage or application defects can be repaired quickly without special efforts. It is best to use the remains of the dry mix that was used in this room, saved after finishing, in work.
- We take a home spray gun for flowers and moisten the restored area with plenty of water.
- We wait 15–20 minutes until the wallpaper becomes soft, then remove the wet fragment using a plastic spatula.
Some types of liquid wallpaper can be reused, so it may be possible to glue the old soaked and mashed mixture in place.
- Ceiling area with filmed material primed.

Liquid wallpaper is a finishing material that combines the advantages of ordinary roll wallpaper and plasters. With the help of liquid wallpaper, you can not only create different textures, but also hide minor defects in the ceiling without laborious plastering and puttying.
Types of liquid wallpaper
This finishing material is notable for its versatility: liquid wallpaper looks great on walls and ceilings, while it goes well with other types of decor. Wallpaper can be applied to any base, including curved elements, while the coating is uniform and seamless.

Liquid wallpaper is a mixture of cellulose or textile fibers with various additives. In stores, they are presented in the form of a dry composition, which is diluted with water before use, or a ready-made solution. The application technology is similar to plastering, for this feature liquid wallpaper is sometimes called silk plaster.

Liquid wallpaper are:
- smooth or embossed, depending on the size of the fibers;
- colored or white - they can be tinted to the desired shade;
- homogeneous or with additives that give a certain texture;
- silk, cotton, cellulose or mixed.
The size of the fibers in the composition of the mixture affects the texture of the finished coating: the more pronounced the fibers, the more rough the finished coating. Also, a relief surface can be achieved using the application technology - a wet layer of wallpaper is rolled with a textured roller, which gives it a certain pattern.

The choice of shades of liquid wallpaper is quite wide, you can easily find a color that suits almost any interior. It should be remembered that after application they will be a couple of tones darker than in dry form. If you can’t choose a shade, you can use a white composition in combination with any water-soluble color scheme.

Various additives in the composition of the wallpaper allow you to give the finished coating an original look. Inclusions of stone chips or metallic sequins, silk and cotton threads, cellulose fibers of various sizes create completely different effects.
Prices for liquid wallpaper
the liquid wallpaper

Thanks to this, you can choose a composition for any style of decoration, from strict classics to modern.

Not only the appearance depends on the material from which the mixture for wallpaper is made. The basis of liquid wallpaper affects the durability and operational properties. The price of wallpaper also depends on the base material.

Cellulosic formulations
Most budget look liquid wallpaper, the low price of mixtures is due to cheap raw materials. In addition to cellulose fibers, their composition includes adhesive components and plasticizers, dyes, and in some cases decorative additives. Cellulose itself has adhesive properties, so this type of wallpaper has excellent adhesion to any surface.

Cellulosic compositions are not highly resistant to ultraviolet radiation, so they are best used in small rooms with moderate temperature and lighting, for example, in a corridor.
Cotton compounds
The basis of such liquid wallpaper is crushed cotton fibers, due to which it is possible to obtain a soft structure with a matte sheen. Cotton is an environmentally friendly material with a high degree of heat and sound insulation, so cotton liquid wallpaper is often used in a nursery or bedroom.

Silk compositions
The most expensive type of liquid wallpaper, they contain natural silk fibers, shiny and durable, which determines the durability and decent appearance. Silk wallpapers practically do not fade, they can be used in rooms with panoramic windows and bright daylight. With the help of decorative additives, silk wallpapers are given different textures, from the effect of a fabric finish to marble imitation.

Mixed lineups
These mixtures contain cellulose and fabric fibers in various proportions, which makes it possible to obtain a finish with high decorative properties for little money. The price of such wallpapers depends on the percentage of silk or cotton fibers in them, as well as decorative additives.
Note! You can independently give any liquid wallpaper a decorative effect by adding additional components to them. Flocks (crushed mineral additives) and glitters (glitters made of metal or mica) will give even ordinary compositions a unique look.

Liquid wallpaper additives - flocks and glitters

Advantages and disadvantages of liquid wallpaper
Before making a choice in favor of liquid wallpaper, you should consider their features, advantages and disadvantages. This will help to avoid disappointment during further operation.

Advantages of liquid wallpaper on the ceiling:
- environmentally friendly material, does not interfere with moisture and air exchange;
- smooth seamless coating that hides defects and cracks;
- no need for complex surface preparation;
- lack of folds, creases in the corners and on uneven surfaces;
- the ability to achieve with the help of color and decorative additives almost any shade and effect, as well as create a decorative painting;
- the possibility of obtaining various textures, from smooth to embossed.
In addition, if a section of wallpaper is damaged, it can be carefully repaired.

- a rather expensive type of finish, 2-5 times more expensive than ordinary wallpaper;
- does not have moisture resistance, peels off when wet;
- cheap cellulose formulations fade and lose their appearance over time;
- require certain skills for application.
The disadvantages of liquid wallpaper are fully compensated the right choice, application and operation. To extend the life of the finish, it is recommended to choose compositions with a silk or cotton content of at least 30-40%, and moisture resistance can be increased by covering them with acrylic water-repellent varnish. To properly apply the composition to the ceiling, you need to follow the recommendations of the wallpaper manufacturer and the finishing technology.
Prices for stretch ceilings
stretch ceiling

The technology of applying liquid wallpaper to the ceiling
The process of finishing the ceiling with liquid wallpaper can be divided into two stages:
- ceiling preparation;
- application of the prepared mixture.
Ceiling preparation should be given Special attention- the adhesion of the wallpaper mixture and the durability of the finish depend on this.
Ceiling preparation
Preparatory work largely depends on the presence and type of old finish. The easiest way is when it comes to a new building with a rough finish - in this case, only a thorough priming of the surface is required. If there is a layer or on the ceiling, they must be removed. Step-by-step instructions for preparing the ceiling with different types old coating for liquid wallpaper is shown in table 1.
Table 1. Preparation of the ceiling for liquid wallpaper.
| View of the old coating | Ceiling preparation technology |
|---|---|
| At least two layers of deep penetration primer are applied to the ceiling with an interval of 3-4 hours for each layer to dry. The primer composition of the "Betonkontakt" type is applied with a roller or a wide brush, alternating the directions of strokes in each layer. After the last layer has dried, liquid wallpaper can be applied. |
| Such ceilings do not require alignment, since the gaps in them are well filled with the composition of liquid wallpaper. It is enough to prime and dry. When applying the first layer of primer on drywall, do not wet the roller or brush too much - this will lead to soaking of the cardboard surface and delamination of the plasterboard. |
| Wallpaper from the ceiling is removed. The sheets are moistened with water or a special wallpaper remover, left for a few minutes and removed with a spatula. Rinse off adhesive residue with water. Liquid wallpaper is moistened with a roller or spray, after swelling of the surface they are scraped off with a wide spatula. Next, the ceiling is primed using conventional technology. |
| These coatings must be removed. Chalk and lime whitewash is moistened with water or special washing solutions, after which they are scraped off with a spatula and the ceiling is finally washed with water. Acrylic-based paints and enamels can simply be cleaned with a spatula or angle grinder in places of delamination. After cleaning, the surface is washed from dust and primed as described above. |
| Spots of various origins may appear on the ceiling during the operation of the building. The most common are rust from fittings or nails, greasy stains from splashes or oil fumes in the kitchen, as well as salt and lime stains from leaks. Rust can be removed with weak solutions of hydrochloric or phosphoric acid. The acid is applied with a brush to the stains, kept until the rust dissolves and washed with water. After drying, the protruding reinforcement and other metal elements are sealed with moisture-resistant putty or painted with moisture-resistant paints, for example, white enamel. Grease stains are well cleaned with warm alkaline solutions and surfactant products. To remove them from the ceiling, use laundry soap, soda ash and dishwashing detergent. Foamed warm solution is applied to the stain, kept for several minutes and washed. You can do this several times until the stains are completely removed. Divorces from water leaks are washed with any detergent with a brush, as a rule, this is enough. Difficult stains are wiped with table vinegar or Whiteness. After removing the stains, the ceiling is ready for priming and further finishing. |
| Cracks and crevices are sealed with plaster, a leveling layer of putty with a fine-grained structure is applied. Since liquid wallpaper wets the ceiling when applied, it is better to use moisture-resistant putty compositions based on cement or polymers. After the putty has dried, the ceiling is primed in 2-3 layers with mandatory drying. Start applying wallpaper. |


Video - Preparing the ceiling for liquid wallpaper
Note! Work on removing old coatings is often associated with a large amount of dust and dirt, so it is better to take furniture and household items out of the room or carefully cover them with plastic wrap.
Calculation of the required number of wallpapers
Manufacturers of liquid wallpaper, as a rule, indicate on the packaging the area to be covered based on the coating thickness of 1-1.5 mm. For a standard package weighing 1 kg, this figure is usually 3-6 m 2 (depending on the texture). If there are minor damages or irregularities on the ceiling, the wallpaper layer in them may turn out to be slightly larger, this must be taken into account when buying.

To calculate the number of bags of dry mix, you need to divide the area of \u200b\u200bthe room by the minimum covered area indicated by the manufacturer. For example, for a room of 20 m 2 and a dry mix with a consumption of 1 kg per 3-4 m 2, you need to divide 20 by 3. The result will be 6.6 packages, this amount must be rounded up to a larger integer, that is, up to 7.
It is not worth saving and calculating at the minimum consumption - wallpapers in different batches may differ slightly in shade, so it will be difficult to buy exactly the same ones. In addition, if during the work you do not have enough material, a noticeable joint will remain on the ceiling.
Note! If you notice a difference in shade in different packages- mix the dry mix in a separate container. You can dilute it with water both immediately and as needed.
Applying liquid wallpaper to the ceiling
After preparing the ceiling and buying the mixture, you can start finishing. Technology and step-by-step instruction applying liquid wallpaper is shown in table 2.


Table 2. Finishing the ceiling with liquid wallpaper - step by step instructions.
| Steps, illustrations | Description of actions |
|---|---|
| The dry mixture is kneaded with water, taking into account the time for the swelling of the solution. This time is indicated on the package and can be from 15 minutes to several hours. AT plastic container enough volume is poured required amount pure water- it is indicated on the packaging. The water temperature should be between 20-25 degrees Celsius. Shouldn't be used warm water, with it the composition will turn out to be too viscous. When using white wallpaper, add the right amount of water-soluble color to the water and stir it completely. The resulting shade can be selected according to the table on the jar of color, based on the ratio of the volume of the finished solution and the tinting paste. Decorative additives are introduced into the dry mixture, mixing it with your hands. Pour the dry composition into the water, constantly stirring it. A small amount of wallpaper can be kneaded by hand, but it is better to use a construction mixer at medium speed. Stirring too fast will saturate the mixture with air bubbles, making it difficult to apply. The mixture is infused for the time indicated on the package, mixed again and proceed to application. |
| The resulting texture of the wallpaper depends on the direction of movement of the trowel. With longitudinal, transverse or circular movements, the fibers lay down in different ways. For a fine-grained structure, this is not so important, but if the wallpaper composition contains large fibers, the sections of the ceiling can be very different. You can experiment in advance on a flat surface to choose the best method. |
| Unlike adhesive technology paper wallpaper, when applying liquid, it is recommended to fix all elements of the ceiling decor before finishing. Skirting boards, moldings and stucco moldings will not stick to the porous surface of liquid wallpaper, it is recommended to stick or fix them in advance. |
| The finished mixture is applied to the ceiling with a trowel or a wide spatula in a thin layer, then leveled with a plastic grater or roller, giving the desired texture. The wallpaper is applied in sections, with each next one starting from the border of the already applied one, leveling it. To make the joints invisible, it is recommended to process the entire surface of the ceiling in one go, before the coating dries. You can also apply liquid wallpaper with a spray gun with a wide nozzle. In this case, a sufficiently rough coating is obtained, which can be rolled with a hard roller (to obtain a smooth surface) or textured (to give a relief pattern). |
| Liquid wallpaper dries within 12-72 hours, depending on the composition and moisture capacity of the surface. During this time, it is better not to ventilate the room and not turn on heaters in it - this way the wallpaper will dry out more evenly. After drying, the surface can be treated with a moisture-resistant varnish using a roller or spray gun. This will extend the life of the wallpaper. |


Master Class. How to make liquid wallpaper with your own hands


Step 3. Pour paper into a bucket, pour 1.25 liters of water

Step 4. Leave for about an hour for "sourdough"

Drill prices


Note! The higher the brand of gypsum, the faster the wallpaper sets.


Step 11. It is better to use an iron spatula (here - 20 cm, just for example)

Video - Applying liquid wallpaper to the ceiling
One of the main advantages of wallpapering is that it is not necessary to remove the old coating from the ceiling. But if there is whitewash, then it is advisable to remove it, and then putty the surface twice. Read more details.

With the help of liquid wallpaper, you can not only get a stable and durable coating, but also create amazing decorative effects. Due to this feature, this type of finish is widely used by professional stylists and finishers. Following the above recommendations, you can also realize your ideas and give the ceiling an original and unique look.
The peculiarity of this finishing material lies in its unique qualities, which combine the positive properties of plaster and paper wallpaper. Ease of application, repair and maintenance, along with environmental friendliness and high aesthetic qualities, make it possible to use this material on any surfaces of premises for various purposes.
This article will talk about the properties of this material and how to apply liquid wallpaper to the ceiling.
Material Features

How to glue with your own hands
The versatility of the material lies in the fact that they look equally good on any surfaces in the room - on the ceiling or walls, and they can also be combined with other finishing materials. The plasticity of the composition, reminiscent of the method of applying plaster, allows you to finish structures that are complex in shape.
If we talk about the ceiling, then it is a bizarre shape. After drying, liquid wallpaper creates a durable monolithic coating without joints and seams, which is their hallmark from ordinary roll wallpaper.

How to apply with your own hands, photo
Liquid wallpaper is sold as a dry mix, which includes cellulose or textile fibers and various additives. Some manufacturers offer a ready-to-use solution. It will be enough to dilute the dry color mixture with additives with water.
The instruction is indicated on the package. The third option is when only the dry raw materials themselves are sold, and the color and additives have to be introduced into the composition with their own hands.

Variety of colors and textures
The liquid wallpaper received its second name - “silk plaster” for its pleasant to the touch silky coating (in the presence of silk fibers in the composition) and the method of applying the material.

Ceiling liquid wallpaper: how to glue
It is possible to identify several external features given material:
- The relief of the coating depends on the size of the fibers that make up the dry mix. - it can be almost smooth or have a pronounced texture;

Structure, learning to glue
- As mentioned earlier, the dry mix can be sold already in dyed form or white, which allows using color to give it any desired shade;

Package
- Additional additives may be included in the dry mix, enriching the texture and giving the coating a more expressive appearance;

- According to the type of fibers, products are cellulose, cotton, silk and combined.
The roughness of the finished coating depends on how high the expressiveness and size of the fibers that make up the material are. Also, the originality of the appearance of the finished coating can be given with the help of various additives. It can be stone chips, metallic sequins, silk or cotton threads.

Applications
You can enhance the relief using a special technology for applying liquid wallpaper, when tools in the form of a texture roller are passed over the wet layer of the laid material, creating the necessary pattern on the coating. Concerning colors material, manufacturers offer a wide range of shades.

Important! When applying liquid wallpaper to the wall, do not be afraid that the wet layer differs from the color of the dry mixture - as it dries, the coating will brighten to the declared shade.
In the case when there are problems with choosing the desired shade, you can use special water-soluble colors, with which the white mixture acquires the desired color.

Important! The material at the basis of a mixture of liquid wallpaper affects not only the decorative effect of the coating, but also the performance. The price of the material also depends on the selected components.

Colored additives for self-preparation
Positive traits

Of the positive qualities of liquid wallpaper, used not only on the walls, but also on the ceiling, the following can be noted:
- When choosing a finishing material, special attention is paid to its decorative effect, which liquid wallpaper undoubtedly possesses. They have the same type of structure due to the homogeneous fibers used in their production. A different appearance can be obtained due to the fact that fibrous fillers have a rich color palette and different saturation of shades. The most expensive, included in the line of exclusive liquid wallpaper, are those that, after application, create a canvas with a certain pattern, due to the special distribution of fibers in the composition. For ordinary liquid wallpaper, a chaotic distribution of fibers is characteristic, which does not reduce the effectiveness and decorativeness of the finished result;

decorative surface
- The unique quality of this finishing material is its high maintainability. If the integrity of the coating is violated due to mechanical impact or the fragment has received non-removable contamination, then the repair can be done on its own. The damaged area is moistened with ordinary water and removed with a spatula, then a new layer of wallpaper is applied to this place and smoothed. After drying, the repaired area will be completely invisible. If there is a cat in the house, then scratches sometimes appear on the wallpaper. In this case, you do not even need to remove part of the material - just moisten the damaged area with water and level it.

Advice! In order to restore the damaged fragment of the coating in a timely manner, it is necessary to leave a small supply of the finished mixture. Over time, it will dry out, but it can always be brought to working condition by diluting it with water.
- Due to the fact that the texture of the working mixture resembles plaster composition, no need for thorough before applying liquid wallpaper. The material fills minor depressions and cracks, leveling the surface. The only thing that is required is that the shade of the coating has the necessary saturation and color;
- Liquid wallpaper is an environmentally friendly material, due to the use of natural ingredients in their manufacture. This allows them to be used for finishing bedrooms and children's rooms;

Ceiling wallpaper
- The vapor permeability of the material also affects the creation of optimal microclimatic indicators in the room;
- Liquid wallpaper has heat and sound insulation qualities, which is important when using them when finishing the ceiling in a multi-storey building;
- It is rather problematic to remove dirt on the ceiling, however, with liquid wallpaper, such work will have to be done less frequently, since static voltage does not accumulate on their surface, and, accordingly, dust does not accumulate;

In the children's room
- Liquid wallpaper has a long service life of 15 to 20 years, which is important when used on the ceiling, since the repair of this surface is always associated with a large expenditure of physical strength. Under the action of sunlight, liquid wallpaper does not fade and does not react to temperature changes;
- Due to its elasticity, this material can be used in newly built houses without fear that it will deform during the natural shrinkage of structures;

- Working with such material does not require special building skills and knowledge. The material is simply applied and also easily removed if necessary;
- With the help of stencils, on the surface of the ceiling, you can create unique author's patterns and ornaments;

- The coating is smooth and monolithic, with no seams and joints. Due to the liquid texture, the solution is easy to apply to hard-to-reach places and corners of the room.
Disadvantages of liquid wallpaper

Among the shortcomings of liquid wallpaper, it can be noted that the material does not have moisture resistance, but when used on the ceiling in living rooms, this is not scary. If liquid wallpaper is supposed to be used in the kitchen, then the surface of the finished coating is treated with acrylic transparent varnish.
In this case, the ceiling can be subjected to wet cleaning, but the vapor permeability of the material is lost. Also, liquid wallpaper is a fairly expensive finishing material.
Important! The cheapest option for liquid wallpaper are those that contain cellulose, but over time, these wallpapers fade and lose their visual appeal. More durable are compositions with cotton or silk fibers (30 - 40%).
Varieties of liquid wallpaper

Liquid wallpaper can be divided into several types depending on the type of fibers that make up their composition:
- Liquid wallpaper based on cellulose fibers are the most affordable, due to inexpensive raw materials. Together with cellulose fibers, the composition of this material is characterized by the presence of adhesives, plasticizers, dyes and, sometimes, decorative additives. One of the positive qualities of this material is its high adhesion to any surface due to the adhesive properties of cellulose.
Due to the fact that the cellulose composition is not resistant to ultraviolet radiation, it is recommended to apply it to ceilings and walls. small spaces with moderate lighting (entrance hall or corridor);

- Liquid wallpaper based on 100% cotton fibers have a soft texture and a matte finish. They also contain a small amount of cellulose, natural mineral components and decorative additives.
Cotton is an environmentally friendly material with high heat and soundproof properties, therefore, liquid wallpaper based on it is most relevant for use in children's rooms and bedrooms;

- Liquid wallpaper based on natural silk fibers have a characteristic luster and high strength, which affects the duration of their operation and decorative effect. Unlike cellulose, liquid wallpaper with silk does not fade under the influence of sunlight, so it can be used in brightly lit rooms with panoramic lighting. A variety of decorative additives allow you to create a different texture of silk liquid wallpaper with the effect of a textile coating or marble imitation. This is a wear-resistant and expensive material;

- contain cellulose and fabric fibers in their composition in different proportions, which affects the cost. The price of such material is affordable, and the decorative quality depends on the amount of cotton or silk fiber with additional additives.

Important! At self-manufacturing liquid wallpaper after adding special components - flocks (crushed mineral additives) and glitters (spangles made of metal and mica), you can significantly improve their decorative qualities.

The procedure for decorating the ceiling with liquid wallpaper

Finishing the ceiling with liquid wallpaper is within the power of one person. This is another advantage over roll materials when an assistant is required.
Of great importance is the preparatory process, since the adhesion of the material to the surface of the ceiling and the durability of the coating depend on its quality.
Ceiling preparation

Preparation of the ceiling for liquid wallpaper begins with the fact that, first of all, it is examined for the presence of places in which moisture seeps and accumulates. If there are such areas, then it is necessary to eliminate the cause of their appearance.
If the work is done in a newly built house, then it will only be required. Otherwise, applying liquid wallpaper to the ceiling can only be done after the previous finish has been removed.
Is it possible to apply liquid wallpaper on uncleaned walls? Of course no. Although this material is able to hide some nuances and surface irregularities, if the old finish is damaged, then the adhesion between the material and the ceiling will be broken.
Advice. You can reduce the consumption of the working mixture by painting the ceiling in the shade of the wallpaper, then it will become invisible if a thin layer is translucent in some places. How to apply liquid wallpaper to the ceiling will be described below.
The order of the preparatory work depends on the type of finish on the ceiling:
| Type of finish | Preparatory work |
|
|
A clean ceiling, freed from the previous finish, is coated with a deep penetration primer (“Betonokontakt”) and allowed to dry. After 3 hours, apply a second layer. Work is carried out with a roller or a wide brush, changing the direction of the tool. Before applying liquid wallpaper, make sure that the surface of the ceiling is completely dry. |
|
|
Plasterboard ceilings do not need to be leveled. It will not even be necessary to seal the joints and places of fastening of sheets with self-tapping screws - the liquid ceiling will reliably fill all the irregularities when applied. Therefore, hanging or false ceiling from drywall, it is enough to treat with a primer and dry thoroughly. |
|
|
If the ceiling was previously covered with wallpaper, then they are removed. To do this, moisten their surface with water or special means, and leave for a while. The material can then be easily removed with a spatula. Is it worth it to wash off the glue residue? After the wallpaper is removed, the surface of the ceiling should be washed with water, some of the glue will be washed off, but some will remain. Then primer is applied to the ceiling, as described earlier. If the ceiling was finished with liquid wallpaper, then with the help of a roller they must first be moistened and wait until they are saturated with moisture, increasing in volume. Then, using a wide spatula, they are removed and the ceiling surface is primed. |
|
|
Whitewash must be removed. Chalk or lime whitewash must be pre-moistened with water or a special wash solution. Then, using a spatula, the material is removed from the ceiling and its surface is thoroughly washed with water. If the ceiling was previously painted with enamels or acrylic paint, then in places of delamination, you can clean it with a spatula or grinder. After that, you need to wash off the dust from the surface and prime it in the usual way. |
|
|
Often, various kinds of spots appear on the ceiling in the form of rust from fittings, grease, salt and lime stains. All these stains are subject to mandatory removal:
|
|
|
For termination interpanel seams, large cracks and crevices use plaster. Then fine-grained putty is applied to the surface of the ceiling as a leveling layer. Due to the fact that liquid ceilings moisten the surface during application, the use of moisture-resistant cement or polymer putties is recommended. When the putty dries, the ceiling is primed twice, thoroughly drying each layer. |


Important! Preparatory stage associated with the removal of previous finishing materials, characterized by the formation a large number construction dust and debris, so it is recommended to free the room from upholstered furniture, and the cabinet one can be covered with a plastic film if it is not possible to remove it from the room.
Applying to the ceiling
When preparatory work finished, you can make ceilings from liquid wallpaper.

How to apply the material to the ceiling will be described below:
| Stage of work | Execution technology |
|
|
In the manufacture of the working composition, it is recommended to use the following tips:
|
|
|
As with plaster, the texture of the liquid wallpaper coating depends on the method of applying the composition. Longitudinal, transverse or circular movements affect the distribution of fibers in the composition. If the wallpaper has a fine-grained filler, then the texture will not be very different. If the fibers are large in size, then it is important to maintain a single tactic for applying the mixture over the entire surface so that there are no differences in different areas. |
|
|
One of the differences in the design of the ceiling with liquid wallpaper is that the ceiling decor in the form of moldings, skirting boards or stucco is pasted before proceeding directly to applying the composition to the ceiling. This is due to the fact that the finished canvas will have a porous structure, to which these products simply will not stick. |
|
|
When applying a thin layer of liquid wallpaper, it is recommended to use a trowel or a wide spatula. Then it is necessary to level the material with a grater or roller so that it acquires the necessary texture. The application of the material occurs sequentially - section by section. It is recommended to work without interruption, covering the entire surface of the ceiling at a time to avoid the formation of joints. Another positive quality of this material is the possibility of mechanizing the process of applying the finished mixture using an airbrush. This will contribute to an even distribution of the composition over the entire area of \u200b\u200bthe ceiling and speed up the work time. |
|
|
After applying liquid wallpaper, it is necessary to withstand from 12 to 72 hours for the canvas to dry. In order for the dehumidification process to occur evenly, it is recommended to avoid drafts and switched on heaters in the room. When the ceiling is completely dry, it can be treated with acrylic varnish, ensuring the moisture resistance of the decorative coating and a long service life. |


How to make liquid wallpaper yourself
If desired, you can make liquid wallpaper yourself. The instruction is given below.
|
|
It is necessary to take plain paper - 40 sheets of A4 format. |
|
|
Sheets can be cut into strips or used whole. |
|
|
The paper is poured into a container and filled with water in a volume of 1.25 liters. |
|
|
The paper is left for an hour so that it is saturated with water. |
|
|
Using a construction mixer, the mixture is thoroughly mixed. |
|
|
Color is added to the mixture in a volume equal to the capacity of two caps. |
|
|
The mixture must be re-mixed thoroughly. |
|
|
Using a measuring spoon from baby food, measure out 40 servings of gypsum. It is important to take into account the brand of gypsum, the higher it is, the faster the setting of the material occurs. |
|
|
Then you need to add PVA glue with a volume of 200 ml. |
|
|
Thoroughly mix all the components until a mass of the required consistency, reminiscent of putty, is obtained. |
|
|
The mass should be held at the end of the spatula and not drain from it. |
|
|
The resulting liquid wallpaper is applied in the manner described earlier. |


The video in this article will tell you how to properly use liquid wallpaper for the ceiling.